How to Monitor GitHub Releases and Get Instant Update Alerts
Track any GitHub repository for new releases using Verid. Get email, webhook, or Slack alerts the moment a new version ships. Free 14-day trial.
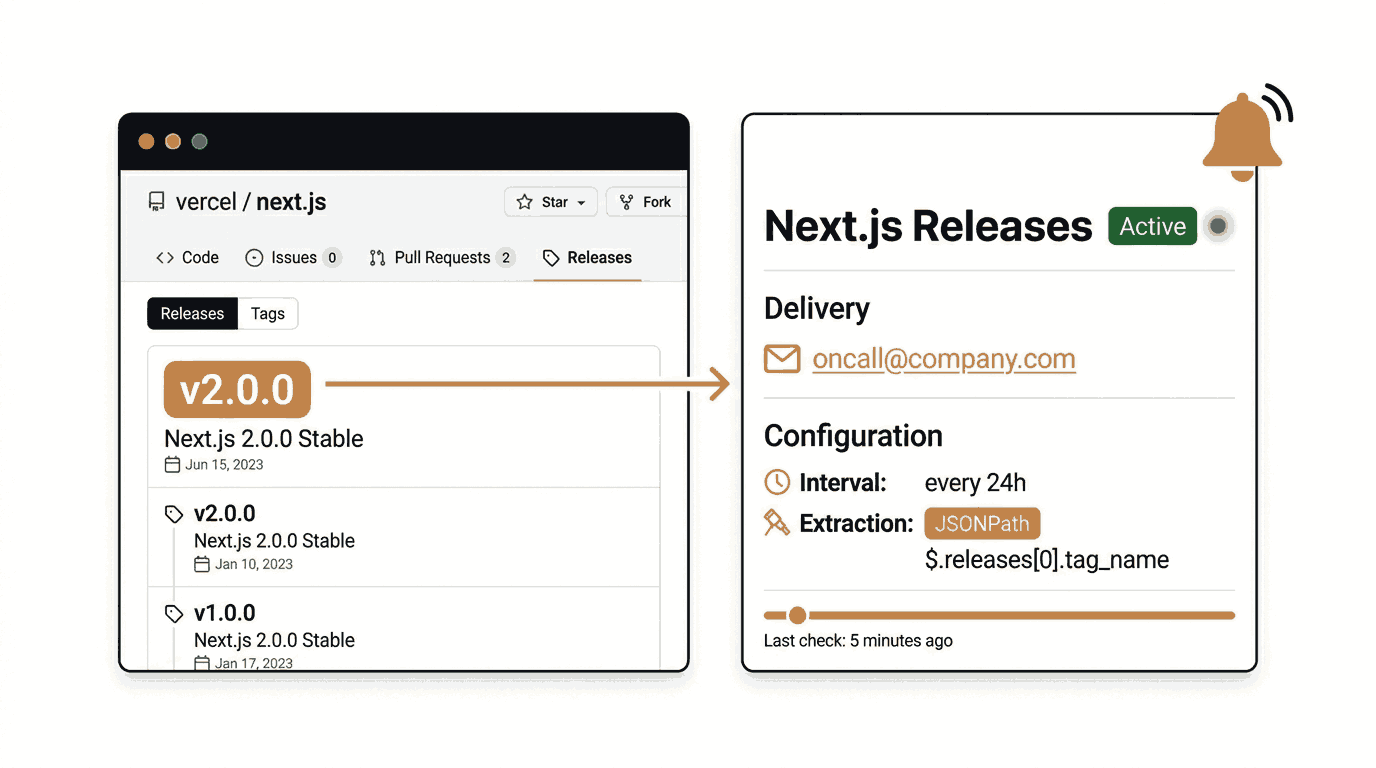
You depend on open-source libraries every day. A new version of Next.js ships. A security patch lands in a database driver. A breaking change drops in a CLI tool you run in production. If you find out two weeks late, that is two weeks of unnecessary risk.
The problem is not that GitHub does not publish releases. It publishes them perfectly well. The problem is that GitHub's built-in notification system sends you every comment, every pull request, and every beta tag along with the real release you actually care about. The signal drowns in the noise.
This guide shows you how to use Verid to monitor any GitHub repository for new stable releases and get a clean, structured notification the exact moment one ships, with zero noise from prereleases or tag spam.
Why GitHub's Built-in Notifications Fall Short
GitHub's Watch feature is all-or-nothing. You can watch a repository, but you will receive notifications for issues, pull requests, commit comments, and release candidates alongside every stable release. For active repositories like React, Next.js, or VS Code, this becomes hundreds of notifications per week.
RSS feeds for releases exist but require a separate feed reader, cannot push alerts into Slack or your own systems without extra tooling, and give you no control over filtering out prereleases.
The GitHub Releases webhook solves the filtering problem, but it requires admin access to the repository. For any third-party project you do not own, that option is not available.
Verid takes a different approach. It polls GitHub's public API on a schedule you define, extracts exactly the fields you care about (version tag, release name, prerelease flag, changelog URL), and fires a notification only when a new stable version is detected. No admin access required. No noise.
The URL Verid Monitors
GitHub exposes a free, unauthenticated JSON API for every public repository:
https://api.github.com/repos/{owner}/{repo}/releases/latestThis endpoint always returns the most recent non-prerelease release as a clean JSON object. Verid polls this URL on your chosen schedule and extracts the fields you define using JSONPath.
For example, monitoring Next.js uses this URL:
https://api.github.com/repos/vercel/next.js/releases/latestThe response includes fields like tag_name, name, published_at, prerelease, and html_url, which is the direct link to the release changelog on GitHub.
Part 1: Setting Up GitHub Release Monitoring from the Verid Dashboard
This section walks through the complete setup process using the Verid dashboard. No coding required.
Step 1: Create a Free Verid Account
Go to verid.dev/auth/signup and create a free account. The 14-day free trial gives you unlimited monitors with 200 runs and no credit card required.
Once you are inside the dashboard, navigate to the API Keys section and copy your API key. It starts with the prefix vrd_.
Step 2: Create a New Monitor
In the Verid dashboard, click the button to create a new monitor. You will fill in the following fields.
Monitor Name
Give the monitor a descriptive name so you can identify it later. For example:
Next.js Stable ReleasesURL to Monitor
Enter the GitHub API endpoint for the repository you want to track. For Next.js:
https://api.github.com/repos/vercel/next.js/releases/latestYou can replace vercel/next.js with the owner and repository name of any public GitHub project you want to track.
Step 3: Choose the Extraction Method
Verid supports six extraction methods. For GitHub release monitoring, the correct choice is JSONPath.
Here is why each method compares for this use case:
| Method | Works for GitHub Releases? | Notes |
|---|---|---|
| JSONPath | Yes, recommended | GitHub returns clean JSON. JSONPath extracts specific fields directly and reliably. |
| CSS Selector | No | CSS selectors target HTML elements. The GitHub API returns JSON, not HTML. |
| XPath | No | XPath also targets HTML or XML structure, not JSON. |
| Regex | Possible but fragile | Can extract a version string from raw JSON text, but breaks easily and returns less structured data. |
| Full-page hash | Not recommended | Fires on any byte change including metadata fields, causing noise. |
| AI / LLM extraction | Unnecessary | AI extraction is best for unstructured or frequently changing HTML layouts. GitHub's API is structured and stable. |
JSONPath is the clear winner because the GitHub releases API returns consistent, well-structured JSON. Your extraction will never break because of a CSS class rename or a layout change.
In the dashboard, select JSONPath as the extraction method and enter the following fields:
| Field Name | JSONPath Expression |
|---|---|
tag_name | $.tag_name |
name | $.name |
published_at | $.published_at |
prerelease | $.prerelease |
html_url | $.html_url |
Each field name can be referenced in predicates and appears in the notification payload you receive.
Step 4: Configure the Predicate
A predicate is the rule that decides when Verid actually sends you a notification. Without a predicate, you would get an alert on every check even if nothing changed.
For GitHub release monitoring, there is one important problem to solve. The /releases/latest endpoint already skips prereleases by default. However, between major version bumps, the tag_name field may not change between checks even though it exists. You want to fire only when the version tag actually changes.
The recommended predicate is a composite AND rule:
- The
tag_namefield must have changed from the previous run. - The
prereleasefield must equalfalse.
This ensures you receive exactly one notification per stable release, no matter how frequently the repository publishes release candidates or betas in parallel.
In the dashboard, select Composite predicate, choose AND, and configure:
- Condition 1:
field_changeson fieldtag_name - Condition 2:
field_equalson fieldprerelease, valuefalse
If you only want to be notified about any tag change with no prerelease filtering, you can use the simpler field_changes predicate on tag_name alone. The composite predicate is the more reliable choice for most teams.
Step 5: Set the Monitoring Schedule
The monitoring schedule controls how often Verid polls the GitHub API endpoint.
For free trial users, a good interval is 24 hours (daily checks, about 30 runs a month per repository). This is a sensible default for tracking open-source releases because most active projects do not ship more than a handful of stable releases per month.
Every plan, including the free trial, can check as often as every minute. Plans differ by how many runs you get each month, and each check uses one run:
| Plan | Runs per Month |
|---|---|
| 14-day free trial | 200 for the trial |
| Lite ($9/mo) | 1,000 |
| Starter ($19/mo) | 5,000 |
| Pro ($49/mo) | 15,000 |
| Scale ($149/mo) | 100,000 |
See verid.dev/pricing for the full plan comparison. For GitHub release monitoring, daily or hourly checks cover virtually every real-world use case.
Step 6: Configure Delivery (Notifications)
Delivery is how Verid sends you the notification when a new release is detected. Verid supports four delivery channels:
| Channel | Best for |
|---|---|
| Individuals, small teams, non-technical users | |
| Webhook | Developers who want to trigger their own workflows |
| Slack | Teams that work in Slack channels |
| Discord | Developer communities on Discord |
For this walkthrough, select Email as your delivery type and enter your email address. You will receive a plain-text summary showing the before and after values of each changed field, including the direct link to the release on GitHub.
Step 7: Save and Activate the Monitor
Click Create Monitor to save your configuration. Verid will run the monitor for the first time immediately to establish a baseline. The first run never fires a notification since there is no previous state to compare against.
From the second run onwards, any time the tag_name changes and the release is not a prerelease, you will receive an email notification.
You can also trigger a manual run from the dashboard at any time using the Run Now button. There is no daily cap; each manual run uses one run from your monthly allowance.
Part 2: Setting Up GitHub Release Monitoring with the Verid API and SDK
For developers who want to automate monitor creation or integrate Verid into a CI/CD pipeline, the full REST API and official Node.js SDK are available on all plans.
Using the REST API
Install curl or any HTTP client. Export your API key:
export VERID_API_KEY="vrd_your_api_key_here"Create a monitor for Next.js stable releases, delivered by email:
curl -X POST https://api.verid.dev/v1/monitors \
  -H "Authorization: Bearer $VERID_API_KEY" \
  -H "Content-Type: application/json" \
  -d '{
    "name": "Next.js Stable Releases",
    "url": "https://api.github.com/repos/vercel/next.js/releases/latest",
    "schedule_interval_seconds": 86400,
    "extract_config": {
      "method": "json_path",
      "fields": {
        "tag_name": "$.tag_name",
        "name": "$.name",
        "published_at": "$.published_at",
        "prerelease": "$.prerelease",
        "html_url": "$.html_url"
      }
    },
    "diff_predicate": {
      "type": "composite",
      "operator": "AND",
      "conditions": [
        { "type": "field_changes", "field": "tag_name" },
        { "type": "field_equals", "field": "prerelease", "value": false }
      ]
    },
    "deliveries": [
      { "type": "email", "email": "you@yourcompany.com" }
    ]
  }'
The schedule_interval_seconds value of 86400 equals 24 hours, about 30 runs a month. Change it to 3600 (1 hour, about 720 runs a month) if you need faster alerts.
Using the Built-in Template
Verid includes a ready-made template for GitHub release monitoring. This is the fastest way to create a monitor without writing a full JSON payload:
curl -X POST https://api.verid.dev/v1/monitors/from-template/github-new-release \
  -H "Authorization: Bearer $VERID_API_KEY" \
  -H "Content-Type: application/json" \
  -d '{
    "name": "Next.js Stable Releases",
    "url": "https://api.github.com/repos/vercel/next.js/releases/latest",
    "deliveries": [
      { "type": "email", "email": "you@yourcompany.com" }
    ]
  }'
The template github-new-release automatically applies the correct JSONPath extraction config and the composite AND predicate for stable-only release detection.
Using the Official Node.js SDK
Install the Verid Node.js SDK from npm:
npm install @verid.dev/sdkCreate the monitor using TypeScript or Node.js:
import { VeridClient } from '@verid.dev/sdk';

const client = new VeridClient({
  apiKey: process.env.VERID_API_KEY!,
});

const monitor = await client.monitors.create({
  name: 'Next.js Stable Releases',
  url: 'https://api.github.com/repos/vercel/next.js/releases/latest',
  schedule_interval_seconds: 86400,
  extract_config: {
    method: 'json_path',
    fields: {
      tag_name: '$.tag_name',
      name: '$.name',
      published_at: '$.published_at',
      prerelease: '$.prerelease',
      html_url: '$.html_url',
    },
  },
  diff_predicate: {
    type: 'composite',
    operator: 'AND',
    conditions: [
      { type: 'field_changes', field: 'tag_name' },
      { type: 'field_equals', field: 'prerelease', value: false },
    ],
  },
  deliveries: [
    { type: 'email', email: 'you@yourcompany.com' },
  ],
});

console.log('Monitor created:', monitor.id);

// Trigger a manual run to test immediately
await client.monitors.runNow(monitor.id);
Set the environment variable before running:
export VERID_API_KEY="vrd_your_api_key_here"
npx tsx monitor.ts
The SDK is available at @verid.dev/sdk on npm. Full API reference is at docs.verid.dev/api-reference.
What the Notification Payload Looks Like
When a new release ships, Verid sends a structured payload to your delivery channel. For email this is rendered as a plain text summary. For webhooks, the raw JSON payload looks like this:
{
  "id": "del_01H...",
  "version": "2026-05-01",
  "monitor_id": "9b1c...",
  "fired_at": "2026-05-08T15:30:00Z",
  "diff": {
    "fields_changed": ["tag_name", "name", "published_at", "html_url"],
    "before": {
      "tag_name": "v15.3.4",
      "name": "v15.3.4",
      "published_at": "2026-04-01T10:00:00Z",
      "prerelease": false,
      "html_url": "https://github.com/vercel/next.js/releases/tag/v15.3.4"
    },
    "after": {
      "tag_name": "v16.0.0",
      "name": "v16.0.0",
      "published_at": "2026-05-08T15:25:00Z",
      "prerelease": false,
      "html_url": "https://github.com/vercel/next.js/releases/tag/v16.0.0"
    }
  }
}
Every field you configured in the extraction step appears in the before and after objects. The html_url field gives you a direct link to the release changelog on GitHub, so your team can click through and review what changed without any extra steps.
Verifying Webhook Signatures
If you use webhook delivery instead of email, Verid signs every request with HMAC-SHA256. You should always verify this signature before processing the payload:
import { createHmac, timingSafeEqual } from 'crypto';

function verifySignature(header: string, rawBody: string, secret: string): boolean {
  const parts = Object.fromEntries(header.split(',').map((p) => p.split('=')));
  const ts = parseInt(parts['t'] ?? '0', 10);
  const sig = parts['v1'];
  if (!ts || !sig) return false;
  if (Math.abs(Date.now() / 1000 - ts) > 300) return false;

  const expected = createHmac('sha256', secret)
    .update(`${ts}.${rawBody}`)
    .digest('hex');

  return timingSafeEqual(
    Buffer.from(expected, 'hex'),
    Buffer.from(sig, 'hex')
  );
}
Verification snippets in Python, Ruby, Go, and PHP are available at docs.verid.dev/webhooks.
Monitoring Multiple Repositories
You are not limited to one repository. You can create a separate Verid monitor for each project your team depends on. Common examples:
| Repository | API URL |
|---|---|
| React | https://api.github.com/repos/facebook/react/releases/latest |
| Next.js | https://api.github.com/repos/vercel/next.js/releases/latest |
| TypeScript | https://api.github.com/repos/microsoft/TypeScript/releases/latest |
| VS Code | https://api.github.com/repos/microsoft/vscode/releases/latest |
| Node.js | https://api.github.com/repos/nodejs/node/releases/latest |
Each monitor is independent, has its own schedule and delivery configuration, and tracks its own diff history.
Monitors are unlimited on every plan. At one check a day, the 14-day trial's 200 runs cover about 14 repositories, Lite's 1,000 runs ($9/month) cover about 33, and the Starter plan at $19/month includes 5,000 runs a month, which is enough to cover an entire ecosystem of dependencies. See verid.dev/pricing for full details.
A Note on GitHub API Rate Limits
GitHub's public API allows 60 unauthenticated requests per hour per IP address. One Verid monitor polling a repository once per hour is well within this limit.
If you are running many monitors on a tight schedule, you can attach an authenticated GitHub token using custom headers on the monitor. Authenticated requests get 5,000 requests per hour. Refer to GitHub's REST API documentation for full rate limit details.
For most teams tracking five to twenty repositories with daily or hourly checks, unauthenticated polling works without any issues.
Extraction Method Comparison for GitHub Monitoring
Image Prompt A pure white background comparison table illustration in flat vector style. Primary color #D38A45 highlights the recommended row "JSONPath" with a checkmark and green badge. Secondary color #0D0F14 for all text. Three columns: Method, Works for GitHub JSON API, Recommended. Rows: CSS Selector (No, X), XPath (No, X), JSONPath (Yes, checkmark highlighted in #D38A45), Regex (Partial, warning), Full-page Hash (No, X), AI Extraction (Unnecessary, dash). Clean SaaS UI table design.
Here is a concise reference for which extraction method to use depending on what you are monitoring:
| Method | Use when |
|---|---|
| JSONPath | Monitoring GitHub's JSON API (recommended for releases) |
| CSS Selector | Monitoring a rendered GitHub web page (e.g. the releases tab at github.com) |
| AI Extraction | The page layout changes frequently or you cannot identify a stable selector |
| Full-page Hash | You want to detect any change on the entire page with no filtering |
| Regex | Extracting a version string from a plain text or Markdown file |
For the GitHub Releases API specifically, JSONPath is always the right choice. The API is stable, well-documented by GitHub, and returns exactly the fields you need without any HTML parsing.
Frequently Asked Questions
Can I monitor GitHub releases without a GitHub account or API token?
Yes. The GitHub releases API endpoint at api.github.com/repos/{owner}/{repo}/releases/latest is publicly accessible for any public repository without authentication. You do not need a GitHub account, a personal access token, or admin access to the repository you want to track. Verid polls this URL directly.
Will I get notified about prereleases and release candidates?
Only if you want to be. The setup in this guide uses a composite predicate that filters out any release where prerelease is true. This means you will only receive notifications for stable releases. If you also want to track betas and release candidates, remove the field_equals condition on the prerelease field from the predicate.
How quickly will I be notified after a new release is published?
The notification arrives after Verid's next scheduled check. With daily checks, this means within 24 hours of the release. With hourly checks, it is within one hour. With 15-minute checks, it is within 15 minutes. Every plan can check as often as every minute; faster checks simply use more runs per month. For most dependency tracking use cases, daily or hourly is more than fast enough.
Can I track npm or PyPI package updates the same way?
Yes. Verid uses the same JSONPath extraction approach for npm and PyPI. For npm, the endpoint is https://registry.npmjs.org/{package}/latest and the version field is $.version. For PyPI, you can use https://pypi.org/pypi/{package}/json and extract $.info.version. Verid has dedicated use cases for both at npm package version tracking and PyPI package updates.
Want this running on your own URL? Spin up the same monitor in about a minute. 5 free, no credit card.
About the author

Software Engineer & Technical Writer
A software engineer and technical writer, Hanzala focuses on developer experience at Verid: SDKs, API reference, and step-by-step guides. He writes about change detection, scheduling, and alert design for teams automating web data.
More from HANZALA SALEEM →Related use cases
How to Monitor JSON API Fields and Get Alerts When Data Changes
Learn how to track specific fields in any JSON API response and receive instant alerts when values change. Step-by-step guide using Verid.
View blueprint →Developer & DevOpsHow to Get Automatic PyPI Package Update Alerts
Get instant alerts when any PyPI package releases a new version. Set up automated Python package update notifications with Verid in minutes.
View blueprint →Developer & DevOpsHow to Track NPM Package Version Changes Automatically
Learn how to monitor npm package versions automatically and get email alerts the moment a new version is published. No code required to get started.
View blueprint →